|
Can't find what you need? Request a disassembly manuals and we will try to locate it and add it to our database.
If you like this manual recomend it to your friends...
| | |
| |
| |
|
 |
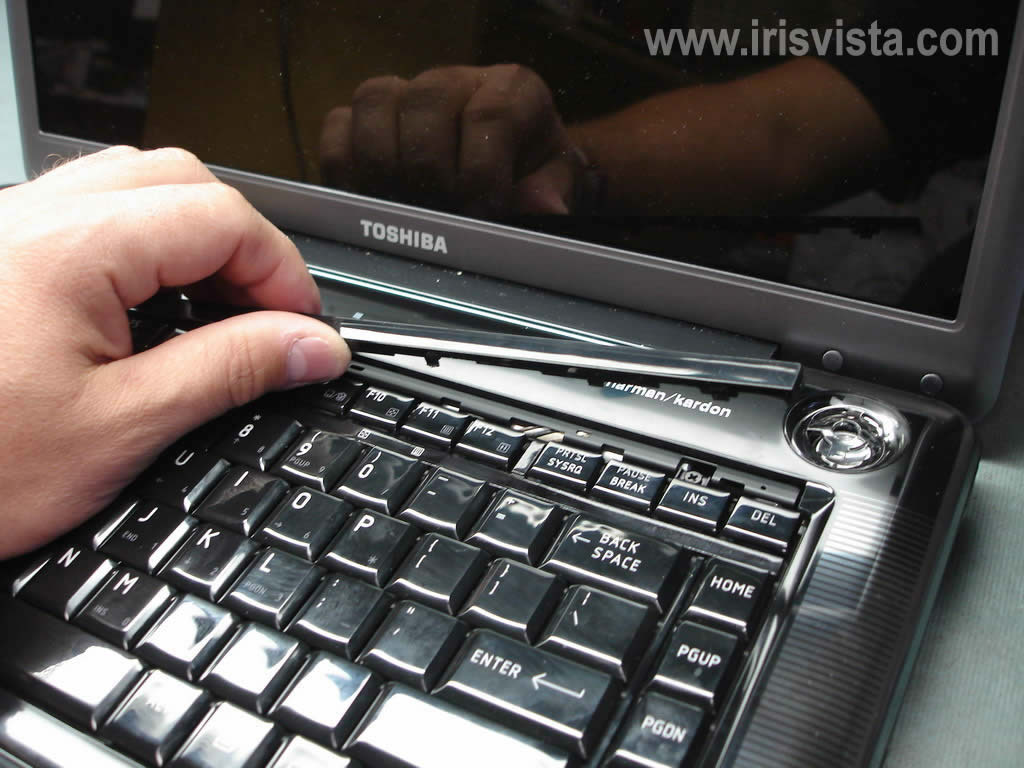
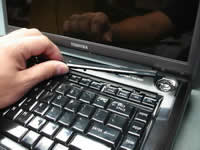
STEP 1
Start laptop disassembly with removing the battery.
First, I'll remove the keyboard.
Carefully lift up the keyboard bezel with a small flathead screwdriver.
|
| |
|
 |
STEP 2
Remove keyboard bezel.
|
| |
|
 |
STEP 3
Remove two keyboard screws.
|
| |
|
 |
STEP 4
Carefully lift up the keyboard.
The keyboard is connected to the motherboard via a flat ribbon cable.
Before you can pull the cable, you have to unlock the keyboard.
|
| |
|
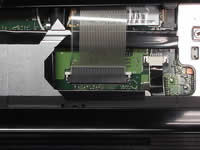 |
STEP 5
Using your finger nails carefully move the white connector tab about 2-3 millimeters up as it shown on the picture.
Release the cable and remove the keyboard.
|
| |
|
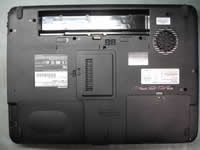 |
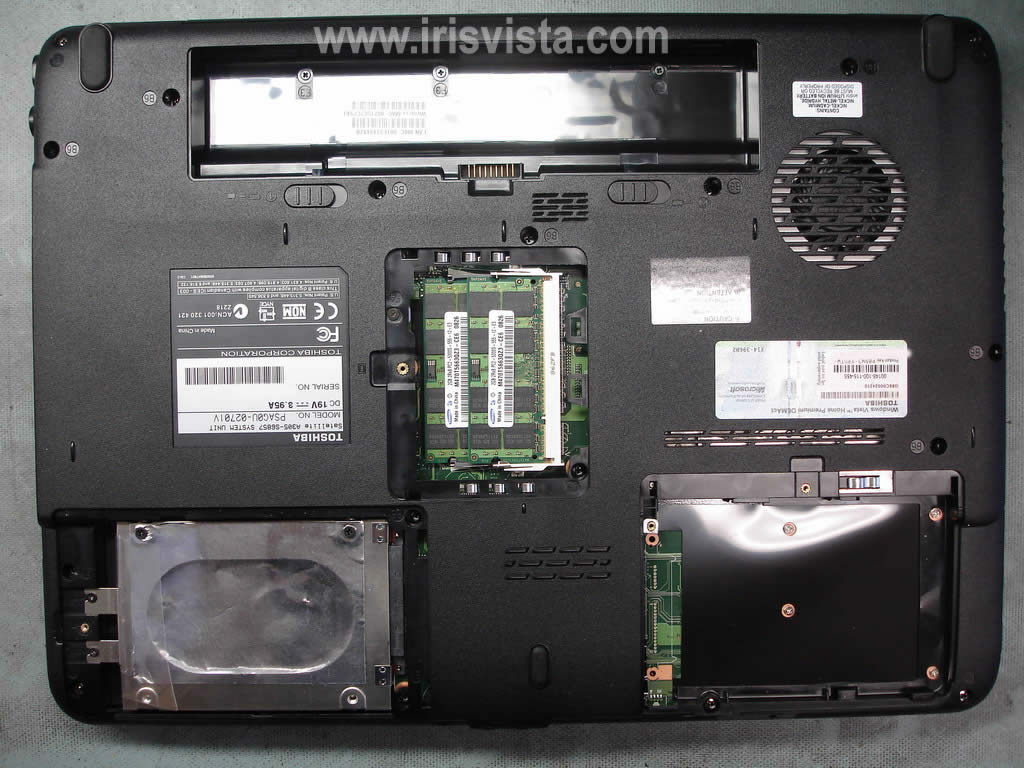
STEP 6
Remove memory cover.
Remove hard drive cover.
Remove blank cover.
|
| |
|
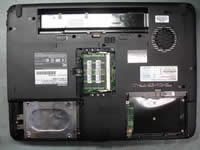 |
STEP 7
Remove both memory modules.
|
| |
|
 |
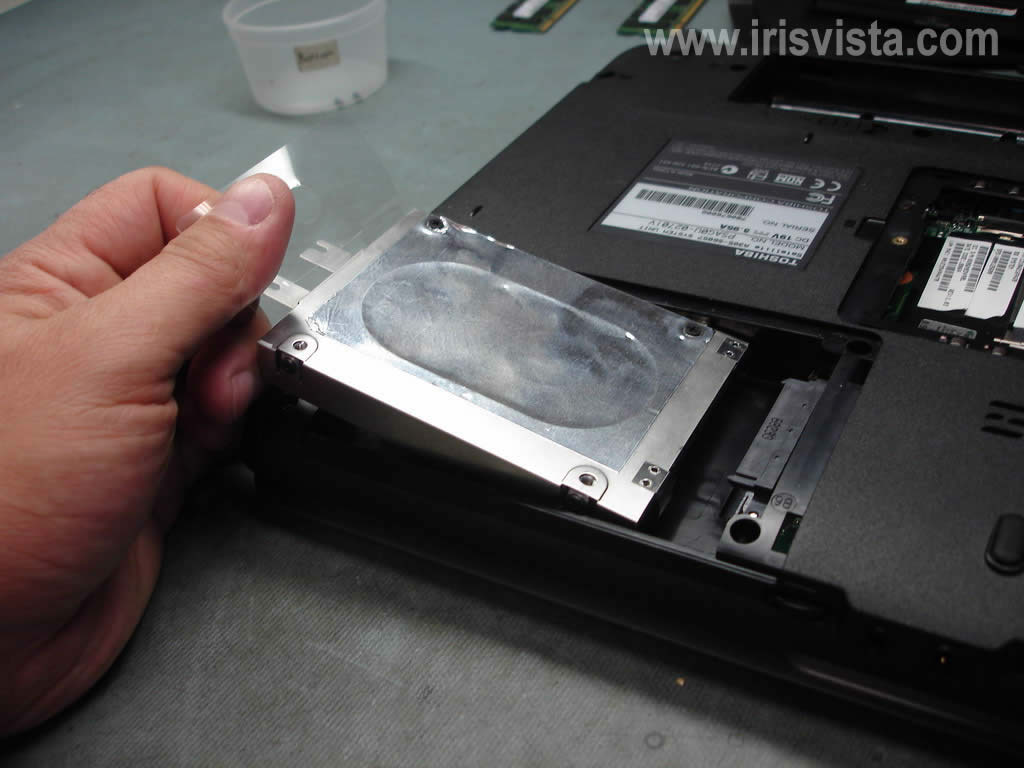
STEP 8
In order to disconnect the hard drive from the motherboard, you'll have to pull it to the left side.
After the hard drive is disconnected, you can remove it from the laptop.
|
| |
|
|
|
STEP 9
Remove one screw securing the DVD drive.
Push the DVD drive from the laptop with a small screwdriver.
Remove DVD drive.
|
| |
|
 |
STEP 10
Remove all screws from the bottom of the laptop.
|
| |
|
 |
STEP 11
Remove one screw securing the top cover assembly.
Disconnect three cables pointed with yellow arrows.
|
| |
|
 |
STEP 12
Now you can start separating the top cover assembly from the laptop base.
|
| |
|
 |
STEP 13
Continue separating top cover.
|
| |
|
 |
STEP 14
Remove the top cover assembly.
|
| |
|
 |
STEP 15
The top cover has been removed.
Remove sticky tape securing the cables.
|
| |
|
 |
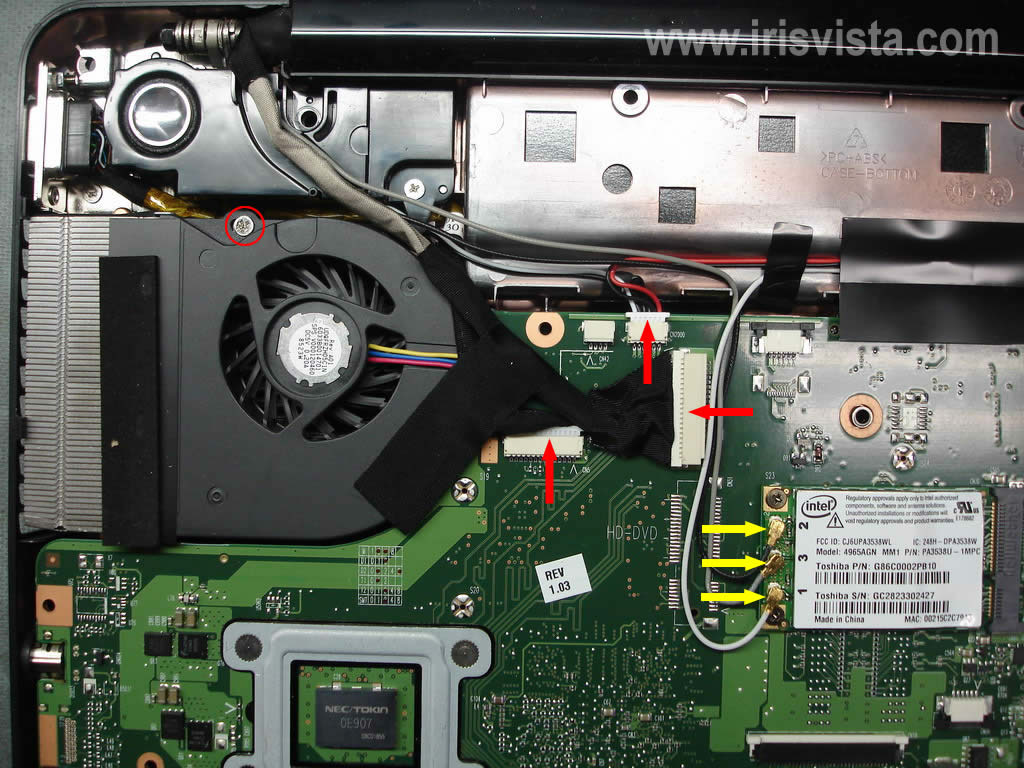
STEP 16
Disconnect three cable pointed with red arrows.
Disconnect three antenna cables (yellow arrows) from the wireless card.
Remove one screw from the fan.
|
| |
|
 |
STEP 17
Disconnect two cables.
Release the power jack harness, so it's not attached to the base assembly.
|
| |
|
|
|
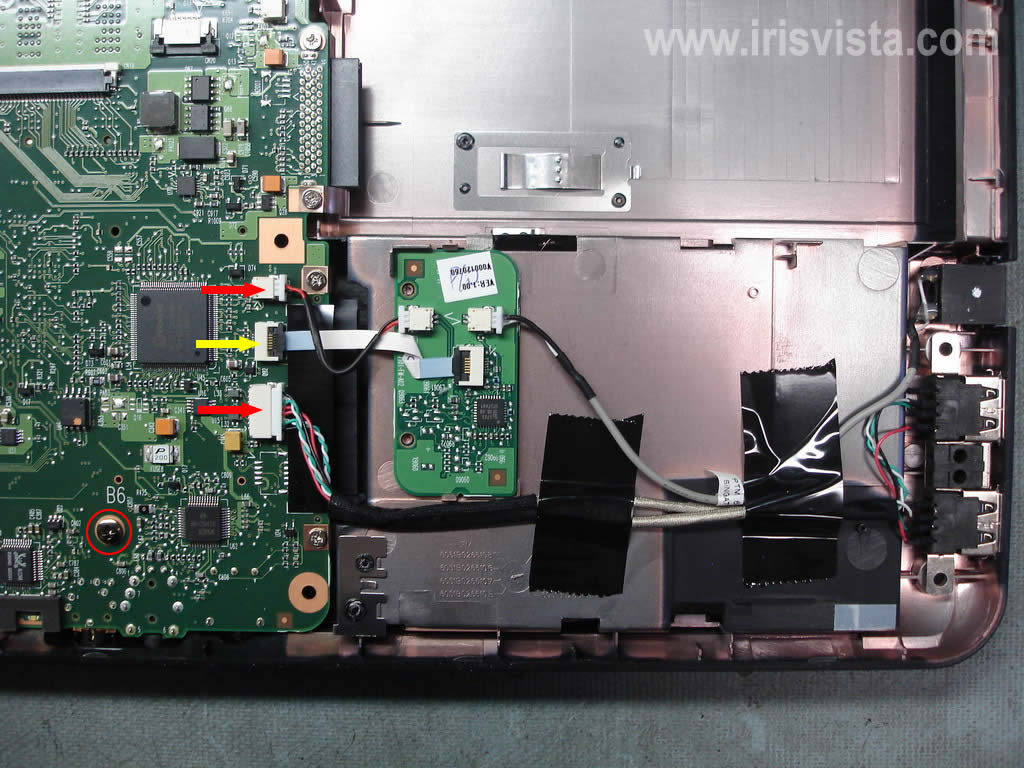
STEP 18
Unplug two cables pointed with white arrows.
Unlock one connector pointed with the yellow arrow and disconnect the cable.
Remove one screw securing the motherboard.
|
| |
|
 |
STEP 19
Start removing the motherboard from the right side as it shown on the picture.
|
| |
|
 |
STEP 20
Lift up and remove the motherboard.
|
| |
|
 |
STEP 21
The motherboard has been removed.
|
| |
|
 |
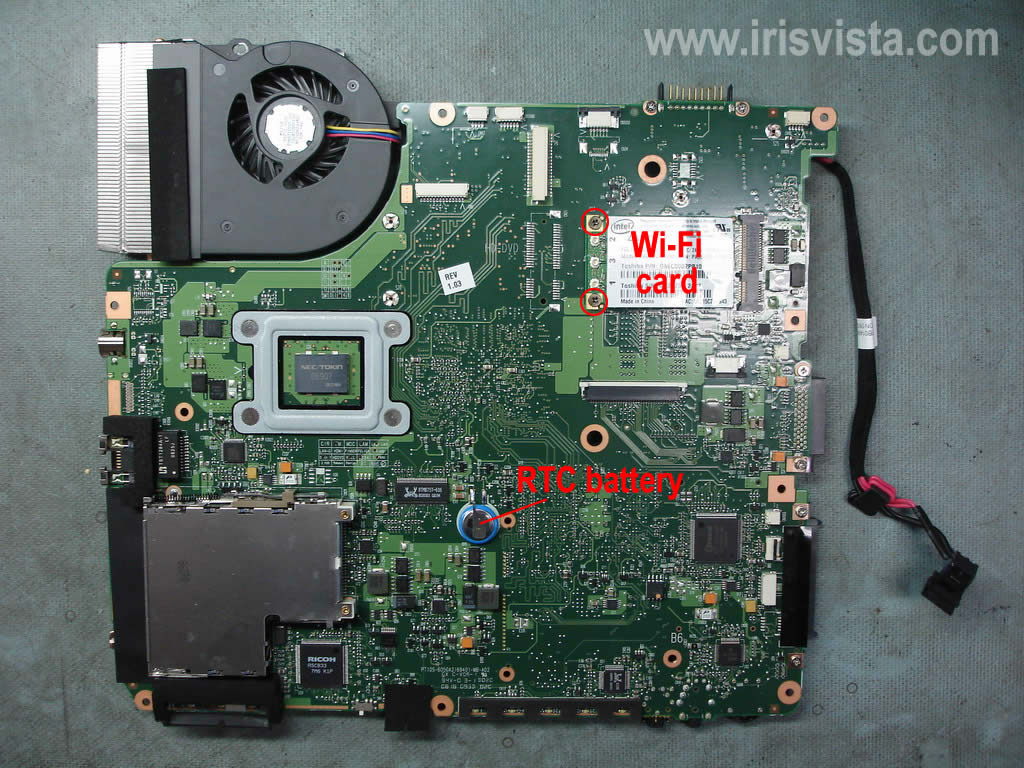
STEP 22
Remove two screws securing the wireless card.
Remove the wireless card if you didn't do it before.
NOTE: The RTC (CMOS) battery is permanently soldered to the motherboard.
|
| |
|
 |
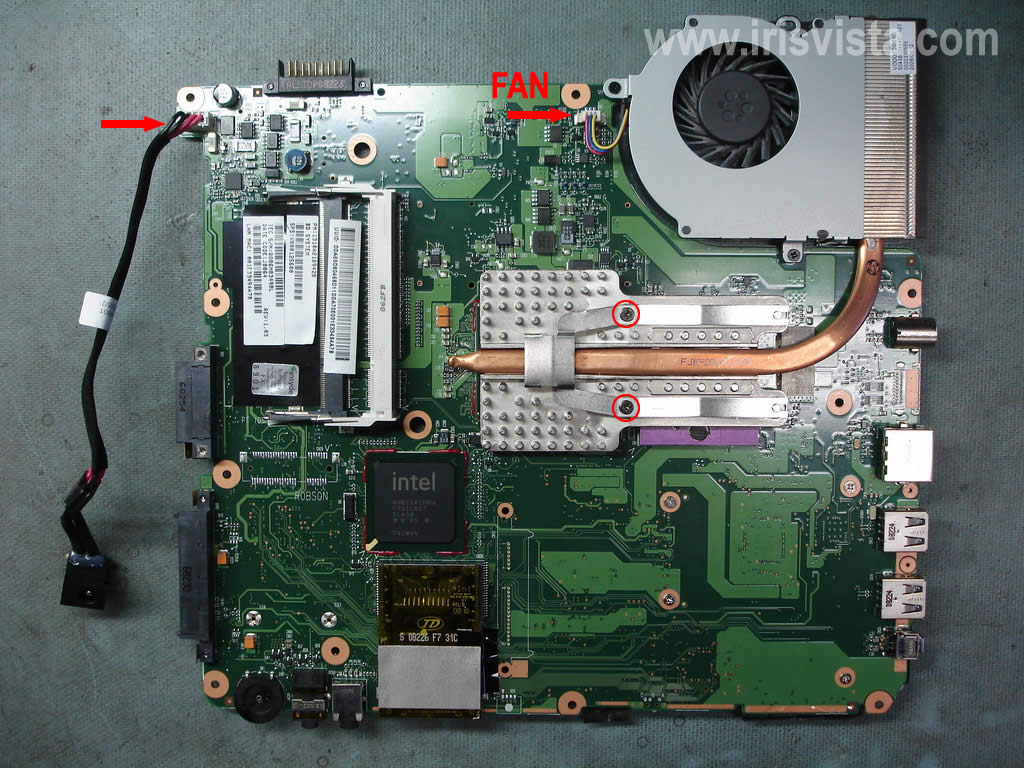
STEP 23
Unplug and remove the DC-IN power jack harness.
Disconnect the cooling fan from the motherboard.
Remove two screws securing the heatsink.
|
| |
|
 |
STEP 24
Remove the cooling module assembly.
|
| |
|
 |
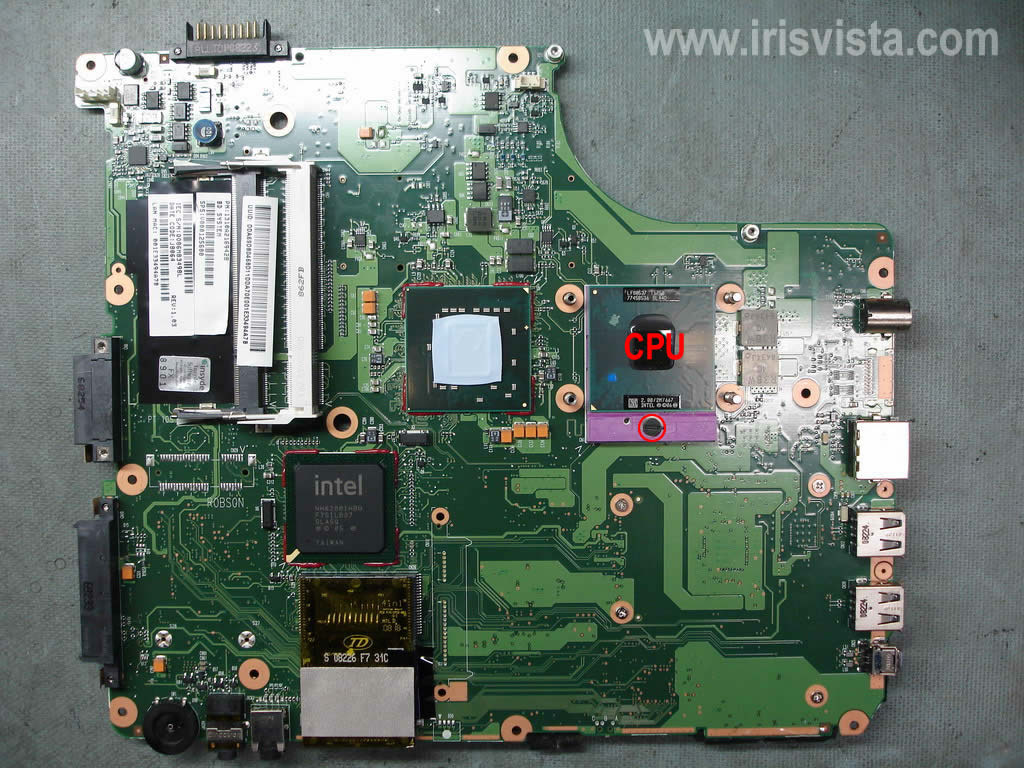
STEP 25
Unlock the CPU socket by turning the screw-lock into "Open" position.
Remove CPU.
|
|
| |
If you like this manual recomend it to your friends...
Search for Disassembly manuals
PinoutMaster team 2005 - 2025
Service manuals -
Car Audio Unlock-
Elemetnt Datasheets-
|